
In the comments on my blogpost about Ohhh Lulu’s Jasmine Bra back in March I got a request for a tutorial to show how I made it reversible. And finally, 4 months later (oops!), here it is! (Warning, picture heavy post ahead!)
It is a rather easy and straight-forward process, with a fiddly bit towards the end. Steps 1 and 2 are the same as in the instructions, but instead of using a lining fabric, use a second fashion fabric. At step 3 sew all vertical seams on both fabrics, except the back seam, like it says in the instructions. Then there is the trick of making it reversible. First, baste the elastics to one of the fabrics along the upper and lower edge, with the picot edge facing towards the inside of the pattern pieces, like this:
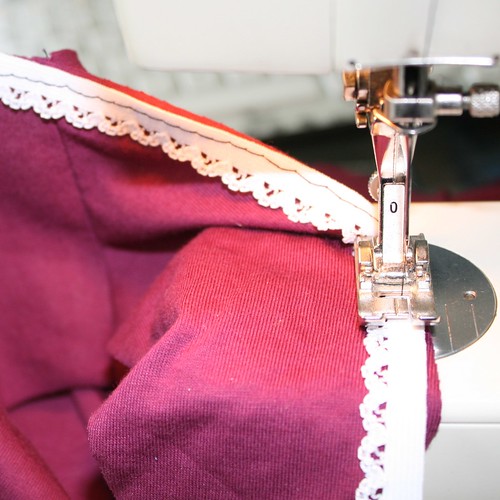
Elastic on Upper Edge – facing inwards
Don’t forget to slightly pull the elastic on the lower edge to let the bra sit snugly there. It should look something like this:
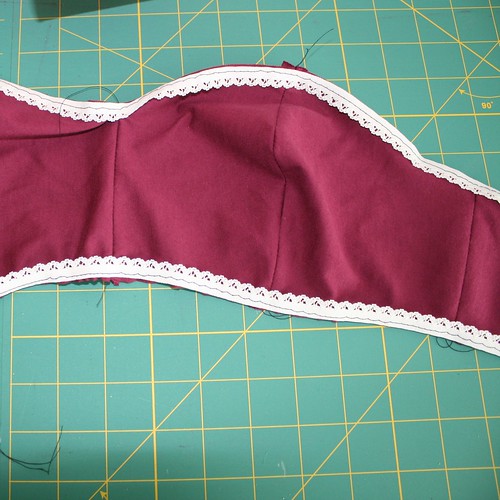
One Side of Reversible Bra
Now attach the straps to this layer, following the instructions of the pattern. (I just used the same elastic cut to the desired length.) Sew the other fashion fabric to this layer along upper edge, right sides facing, like this:
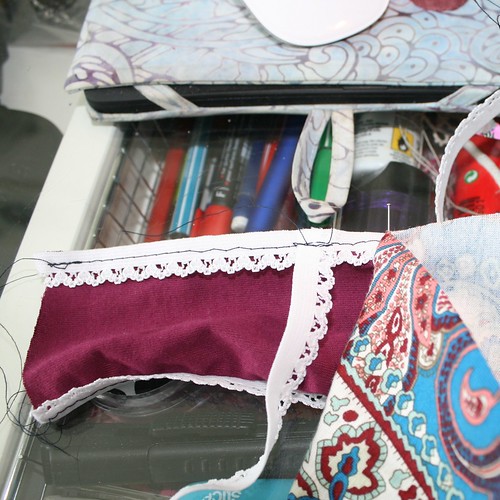
Sew Bra Shells Together – right sides facing
Then sew the center back seam and check the fit. I do it this way to ensure it’s completely reversible. Plus, I’m too lazy to source bra closures. (I would recommend making a non-reversible muslin first, though. Less work wasted if the cups are off!) If it’s too loose, just take that seam in. If it’s too tight… Well… Go ahead and swear…
Then turn right sides out, give the upper edge a good press (I do this in 2 steps to get a crisper edge) and topstitch (with a zigzag or other stretchy stitch) to keep both layers in place.
So far, so easy… Now the fiddly bit. First, turn and press the lower edge so the elastic shows on the right side, like so:
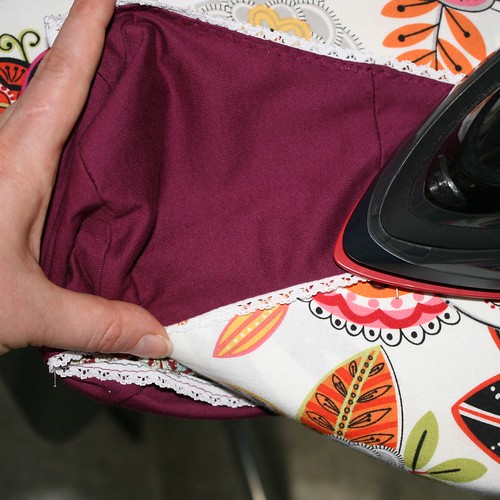
Turn And Press Lower Edge
Then, on the other fashion fabric, turn under the lower edge seam allowance:
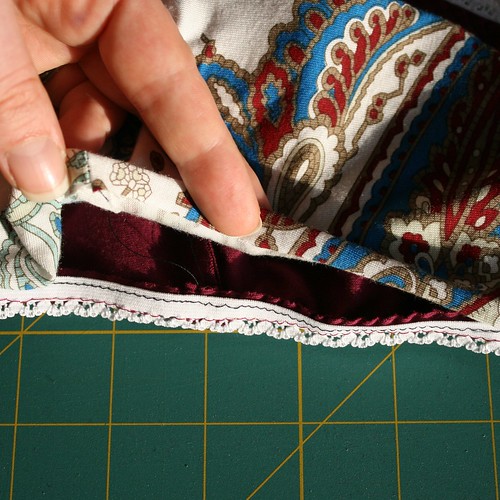
Turn Under Seam Allowance
And pin to the other fabric and elastic:
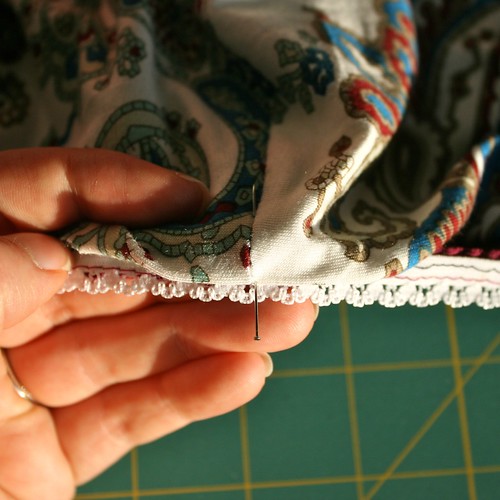
Pin to Elastic And Other Fashion Fabric
I use a lot of pins, but the safest and neatest way would be to hand-baste all the layers together. Then it’s time for the last step: topstitch carefully, as you did with the upper edge.

Topstitch Lower Edge to Elastic
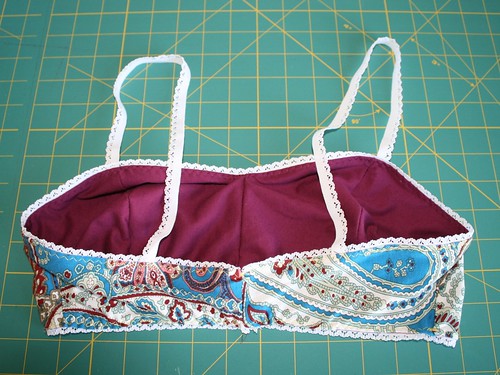
Tadaa! You’re done! A reversible bralette:

Reversible Jasmine Bralette – Wild side
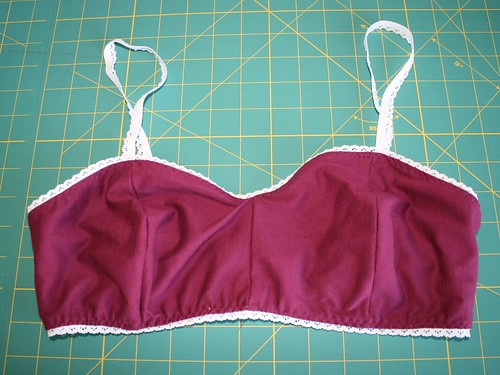
Reversible Jasmine Bralette – Solid side
And here’s the proof it’s all the same bra:
Reversible Jasmine Bra – Back view
That’s it, I hope this was helpful! If something is still unclear, let me know, I’ll try and explain. Have a good one!

You have explained it well
LikeLike
Thank you!
LikeLike
Nicely explained:) I just recently made my first Jasmine and it made up very quickly, it’s a really cute pattern.
LikeLike
I really should try making this. Thanks for the tutorial!
LikeLike
hello! your blog is just simply awesome and lively! Are you in Turku? I just have come here 1 week ago for a master degree. Could we can talk more about sewing, handicraft and kniting? I know knitting a little bit! 🙂
cheers!
p/s: You see my email, right?!
LikeLike
Hi! I just visited your blog. It is simply awesome! Are you in Turku? I just came here 1 week ago for master degree!
Nice to know your blog!
Hope we can talk little bit about sewing, handicraft and kniting as well! I know it a little bit!
cheers!
LikeLike
Thank you! I would love to hang out, but I live in Jyväskylä. 😦 maybe try to find a group in Turku through ravelry? That’s how I found people here.
LikeLike